Free Canva Training: From Novice to Pro in 5 Easy Steps
Unlocking the power of visual communication has never been more accessible, and at the heart of this revolution lies Canva. This incredibly intuitive online design platform has empowered millions to create stunning visuals without needing extensive graphic design experience or expensive software. Whether you dream of crafting captivating social media posts, designing professional presentations, or building an engaging brand identity, Canva provides the tools to bring your vision to life. This comprehensive guide will take you on a journey from a complete novice to a Canva virtuoso, equipping you with the knowledge and skills to master this versatile platform.
Canva burst onto the scene with a simple yet powerful mission: to make design accessible to everyone. Founded in 2012, its user-friendly interface and vast library of templates, fonts, and stock photos quickly garnered a massive following. Before applying advanced techniques, understanding the core essence of Canva is paramount. It functions as a drag-and-drop design tool, meaning you can effortlessly move and resize elements on your canvas. This intuitive approach removes the intimidation often associated with traditional design software, allowing creativity to flow freely.
Contents
- 1 What is Canva and Why is it So Popular?
- 2 Setting Up Your Canva Account
- 3 Understanding the Main Workspace
- 4 Exploring the Design Panels: Templates, Elements, Text, and More
- 5 Utilizing the Top Toolbar for Customization
- 6 Choosing the Right Template and Customizing It
- 7 Adding and Editing Text, Images, and Graphics
- 8 Applying Brand Colors, Fonts, and Effects
- 9 Arranging and Aligning Elements for Visual Harmony
- 10 Utilizing Layers and Grouping for Complex Designs
- 11 Exploring Animation and Video Features
- 12 Mastering Effects, Filters, and Photo Editing
- 13 Working with Frames and Grids for Layout Creativity
- 14 Creating Consistent and On-Brand Marketing Materials
- 15 Designing Compelling Social Media Content
- 16 Developing Professional Presentations and Reports
- 17 Utilizing Canva for Web Banners, Email Headers, and More
- 18 Inviting Team Members and Setting Permissions
- 19 Providing Feedback and Making Revisions
- 20 Downloading Designs in Various Formats
- 21 Embedding Designs and Sharing Links
- 22 Leveraging Keyboard Shortcuts for Efficiency
- 23 Staying Updated with New Features and Trends
- 24 Utilizing Canva’s Learning Resources and Community
- 25 Practicing Regularly and Experimenting with Different Styles
What is Canva and Why is it So Popular?
Canva is more than just a design tool; it’s a creative ecosystem. Its popularity stems from several key factors. First, its accessibility—it’s a web-based platform with accompanying mobile apps, meaning you can design anywhere, anytime. Second, its extensive library of pre-designed templates caters to virtually every design need, from social media graphics and marketing materials to resumes and invitations. This eliminates the need to start from scratch, significantly accelerating the design process. Finally, Canva’s freemium model allows users to access a substantial array of features without a subscription while offering advanced functionalities and an even richer asset library for paid subscribers.
Setting Up Your Canva Account
Getting started with Canva is straightforward. Simply visit the Canva website and sign up using your email, Google account, or Facebook account. Once registered, you’ll be prompted to describe what you’ll be using Canva for, which helps tailor your initial experience with relevant templates and suggestions. Take a moment to explore the dashboard, which serves as your central hub for all design activities. You’ll find options to create new designs, access your previous projects, and discover new templates.
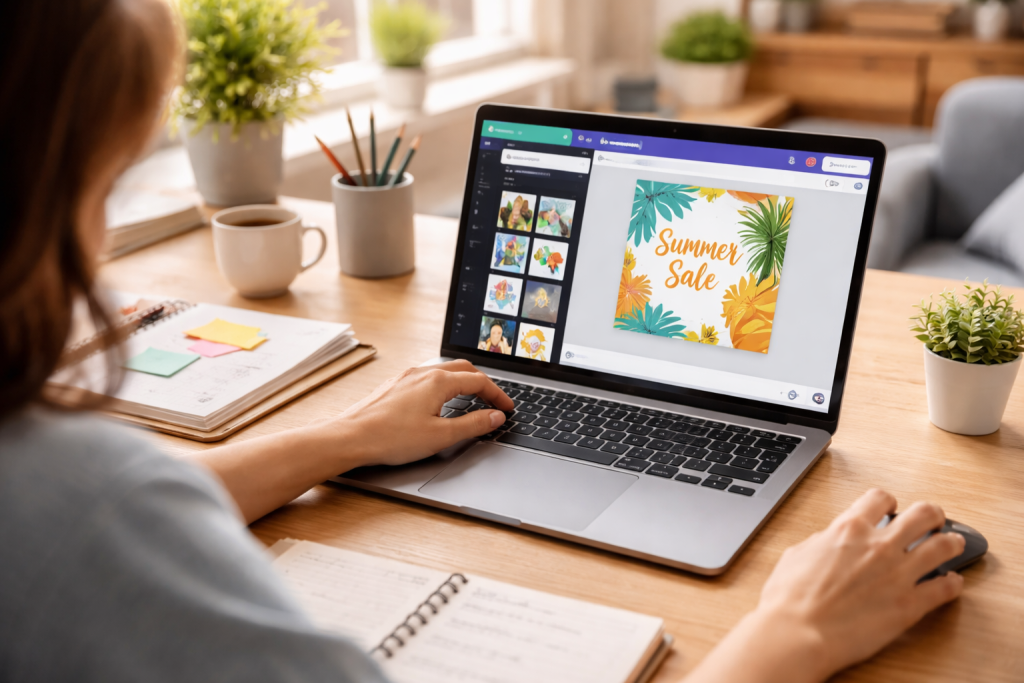
The true power of Canva lies in its deceptively simple yet remarkably feature-rich interface. Mastering its layout and understanding the function of each panel will dramatically improve your design workflow and efficiency. When you open a new design, you’ll see your canvas at the center, surrounded by various toolbars and panels.
Understanding the Main Workspace
The majority of your creative magic takes place in the main workspace. The central area is your canvas, where you arrange and manipulate design elements. Above the canvas, you’ll find the main menu bar, which houses essential functions such as “File” (for saving, downloading, and making copies), “Resize” (a Pro feature), and “Share.” To the left of the canvas are the design panels, which are your main source for adding elements.
Exploring the Design Panels: Templates, Elements, Text, and More
The left-hand sidebar is your design powerhouse. It’s home to several crucial tabs:
- Templates: The template tab is your starting point for most designs. Explore thousands of professionally designed templates categorized by purpose (e.g., Instagram Post, Presentation, Flyer). You can filter by style, color, and theme to quickly find the perfect foundation.
- Elements: This tab is a treasure trove of graphic assets. Here you’ll find shapes, lines, icons, illustrations, photos, videos, and audio. The search bar is incredibly powerful, allowing you to quickly locate specific elements.
- Text: Add headings, subheadings, and body text with ease. Canva offers a vast selection of fonts, allowing you to categorize them by style or search for specific ones. You can also apply pre-designed text combinations for aesthetic consistency.
- Uploads: This step is where you bring your own assets into Canva. Upload images, videos, and audio files from your computer to personalize your designs.
- Brand Kit (Pro Feature): For consistent branding, the Brand Kit allows you to store your brand colors, fonts, and logos, making them readily accessible for all your designs.
- Photos: Access a massive library of stock photos, both free and paid, to enhance your visuals.
- Styles: Apply predefined color palettes and font combinations with a single click, instantly transforming the look and feel of your design.
- Background: Choose from various solid colors, gradients, patterns, or images to serve as your design’s backdrop.
- Apps: Connect Canva with other applications like Google Drive, Dropbox, and social media platforms for seamless integration.
Utilizing the Top Toolbar for Customization
When you select an element on your canvas, a contextual toolbar appears at the top. This toolbar provides options specific to the selected element. For an image, you’ll see options for “Edit Image” (filters, effects, background remover), “Crop,” “Flip,” “Animate,” and “Position.” For text, you’ll find font style, size, color, bold, italic, underline, alignment, and spacing controls. Understanding these dynamic toolbars allows for precise control over every aspect of your design.
Now that you’re familiar with the interface, let’s put your knowledge into practice by creating a compelling design. We’ll walk through the process of designing a social media graphic for a hypothetical event.
Choosing the Right Template and Customizing It
Begin by searching for “Instagram Post” in the templates section. Browse through the options until you find a template that aligns with your event’s theme or aesthetic. Click on it to apply it to your canvas. Now, the real customization begins.
Adding and Editing Text, Images, and Graphics
Select the existing text boxes on the template and replace them with your event details: event name, date, time, and location. Experiment with different fonts from the “Text” tab, ensuring readability and visual hierarchy. Adjust text colors to match your brand or chosen theme.
Next, replace placeholder images with relevant visuals from Canva’s photo library or your own uploaded images. Utilize the “Edit Image” feature to apply filters, adjust brightness, or remove backgrounds if needed. Add supporting graphics from the “Elements” tab, such as icons or shapes, to highlight key information or add visual flair.
Applying Brand Colors, Fonts, and Effects
This step is critical to preserving brand consistency. If you have a Brand Kit, apply your brand colors with a single click. Otherwise, use the color picker to select specific hues. Ensure your chosen fonts are consistent with your branding guidelines. Experiment with various effects on your text and images to add depth and visual interest. Consider adding a subtle shadow to text or a border to an image.
Arranging and Aligning Elements for Visual Harmony
Thoughtful arrangement is key to a professional-looking design. Use Canva’s smart guides (the pink lines that appear as you move elements) to align objects precisely. Group related elements together to move and resize them as a single unit. Pay attention to white space, ensuring your design doesn’t feel cluttered.
While Canva’s basic features are powerful, exploring advanced functionalities will unlock a new realm of creative possibilities and allow you to produce truly exceptional designs.
Utilizing Layers and Grouping for Complex Designs
As your designs become more intricate, managing elements becomes essential. The “Position” button in the top toolbar allows you to access layer controls. You can bring objects forward or send them backward, controlling their stacking order. This is particularly useful when working with overlapping elements or creating depth. Grouping multiple elements together (select them all and click “Group” in the top toolbar) allows you to move, resize, and edit them simultaneously, saving valuable time and maintaining consistency.
Exploring Animation and Video Features
Canva isn’t just for static images; it’s also a powerful tool for creating engaging animated designs and videos. Select any element (text, image, or graphic) and click “Animate” in the top toolbar to choose from a variety of animation styles. You can apply page animations as well, bringing your presentations and social media stories to life. The “Video” tab in the elements panel allows you to integrate stock videos or upload your own, complete with editing tools to trim, split, and add audio.
Mastering Effects, Filters, and Photo Editing
The “Edit Image” feature offers a robust suite of photo editing tools. Beyond basic brightness and contrast adjustments, explore a wide array of filters to instantly change the mood of your images. The “Background Remover” (a Pro feature) is a game-changer for isolating subjects. Experiment with “Shadows” and “Duotone” effects to add stylistic flair to your photos and graphics.
Working with Frames and Grids for Layout Creativity
Frames allow you to crop images into specific shapes, while grids provide predefined layouts for arranging multiple photos or videos. These tools are invaluable for creating aesthetically pleasing collages, social media carousels, or professional-looking presentations. Simply drag an image or video into a frame or grid, and it will automatically adjust to fit the shape.
Canva’s utility extends far beyond personal projects, and it has become vital for businesses of all sizes to elevate their marketing and branding efforts.
Creating Consistent and On-Brand Marketing Materials
Consistency is key to strong branding. With Canva, you can create a cohesive visual identity across all your marketing channels. Design stunning social media posts, stories, and covers that reflect your brand’s personality. Craft professional brochures, flyers, and business cards using your brand colors, fonts, and logos. The ability to save brand assets in your Brand Kit streamlines this process, ensuring every piece of collateral aligns with your visual guidelines.
Designing Compelling Social Media Content
Social media is a visual medium, and Canva empowers businesses to create eye-catching content that stands out in crowded feeds. Beyond static images, leverage Canva’s animation and video features to produce dynamic stories and reels. Design engaging infographics, carousels, and quotation images to share valuable information and inspire your audience.
Developing Professional Presentations and Reports
Gone are the days of drab PowerPoint presentations. Canva offers a plethora of professionally designed presentation templates that you can customize to your brand. Incorporate charts, graphs, and impactful visuals to communicate your message effectively. For business reports, Canva helps you present complex data in an easy-to-understand and visually appealing format, improving engagement and comprehension.
Utilizing Canva for Web Banners, Email Headers, and More
Your online presence deserves the same level of design excellence. Create captivating web banners for your website, ensuring they are optimized for various screen sizes. Design attractive email headers that reinforce your brand and encourage recipients to open your messages. Canva’s versatility means you can create virtually any digital asset needed for your online marketing efforts.
Canva is not just a solo design tool; it’s also built for collaboration, making it ideal for teams and client interactions.
Inviting Team Members and Setting Permissions
When working on a team, invite collaborators to your design by clicking the “Share” button and entering their email addresses. You can set different permission levels, allowing them to either “Edit,” “Comment,” or “View” your designs. This controlled access ensures smooth workflow and prevents unintended changes.
Providing Feedback and Making Revisions
Canva’s commenting feature simplifies the feedback process. Collaborators can directly add comments to specific elements or areas of the design, clearly indicating what requires revision. designer, you can then address these comments and mark them as resolved. This iterative process guarantees a shared understanding and facilitates the efficient achievement of the desired outcome.
Downloading Designs in Various Formats
Once you finalize your design, Canva provides a variety of download options to meet your requirements. For social media, download as a PNG or JPG. For print, PDF Print provides high-resolution output. For animated designs or videos, MP4 is the standard. Make sure to choose the appropriate format for your intended use to ensure optimal quality.
Embedding Designs and Sharing Links
Beyond downloading, Canva allows you to share a direct link to your design, enabling others to view or even edit it (depending on permissions) without having a Canva account. You can also embed your designs directly into websites or blogs, creating interactive elements that dynamically update if you make changes in Canva.
Moving beyond the fundamentals, these advanced tips will help you refine your skills and truly master Canva, taking your designs from excellent to extraordinary.
Leveraging Keyboard Shortcuts for Efficiency
Just like any professional design software, Canva offers a range of keyboard shortcuts that can significantly speed up your workflow. Learn shortcuts for common actions like copying, pasting, grouping, and undoing. A quick search for “Canva keyboard shortcuts” will provide a comprehensive list to get you started.
Staying Updated with New Features and Trends
Canva is constantly evolving, regularly adding new features, templates, and design elements. Make it a habit to explore the “What’s New” section or subscribe to Canva’s newsletters to stay informed. Additionally, pay attention to current design trends to ensure your creations remain fresh and relevant.
Utilizing Canva’s Learning Resources and Community
Canva provides an impressive array of learning resources, including tutorials, blog posts, and design schools, all accessible through their website. Join the Canva community forums or social media groups to connect with other designers, ask questions, and share your work. Engaging with the community is an excellent way to learn new techniques and gain inspiration.
Practicing Regularly and Experimenting with Different Styles
The path to mastery in any creative endeavor is consistent practice. Challenge yourself to design something new every day, even if it’s just a small social media graphic. Experiment with different styles, color palettes, and typographic combinations. Don’t be afraid to break the rules and discover your unique design voice. The more you explore and experiment, the more confident and skilled you will be at using Canva. From novice to professional, the journey with Canva is an exciting one, filled with endless creative possibilities.

Bright Guide Center is a trusted online platform dedicated to providing practical learning guides, study tips, career advice, and beginner-friendly digital skill resources. Our mission is simple: to help students, job seekers, and self-learners build real skills for academic success, career growth, and personal development.